- Inexpensive - 100g of yarn will be enough for most patterns!
- Portable - best project for traveling!
- Easy & Useful - Great for beginners and practicing stitches!
- Quick results - A little bit every evening and you will be done in 1-2 weeks!
 |
| My Roll Top Socks |
A short while after I recycled an old sweater and had a bunch of yarn lying around with no idea what to do with it. I finally dared myself and started a ankle-sock pattern called Roll Top Socks by Dawn Pietzsch. It only took me about 3 days to complete and I immediately knew I would never go back to tube socks. It's so much faster and interesting to knit heel-socks!
There are thousands of patterns and many different construction techniques; you can even create your own pattern!
Basic Sock Anatomy
There are eight main parts: Cuff, Leg, Heel Flap, Turned Heel, Gusset, Instep, Sole, and Toe.
 |
| The eight Parts in Color |
Next is the heel flap, an easy square, usually knit back and forth on one needle.
After this part you will 'turn the heel'. This part scares most knitters away from ever knitting socks, but it isn't any more difficult than the rest of the sock, it just needs a little bit more attention, that's all. The heel is knit in short rows, which means that you are not working with all the stitches. This might sound confusing, but it's necessary to achieve the desired shape in the end.
The next step is the gusset, a triangular-shaped piece that connects the leg/instep stitches with the heel flap and the turned heel. To do this, you will have to pick up stitches along the sides of the heel flap and then gradually decrease until you reach the original number of cast on stitches. At the same time, the instep and sole stitches will continue to be knit in the round.
After you are back to the amount of stitches you had in the beginning, it's back to easy knitting of only instep and sole to shape the foot of the sock. This part will continue until you reach the point where the length of the sock is about one inch shorter than your foot.
At this point you will start the last step, shaping the toe, which is another easy series of decreases. To close up the remaining hole you will need to graft the remaining stitches together to create a flat seam. The Kitchener stitch is the most common and cleanest way to do this. Trust me, it sounds more complicated than it actually is.
That's it! The only thing you have to do now is pick a pattern and start trying it for yourself!
Continue to read and see some of my favorite patterns!
Kalajoki by Tiina Seppälä free!
Published in Yliveto
 |
| © Tiina Seppälä |
Froot Loop by Kristi Geraci free!
Published in Knitty, Spring 2008
 |
| © Debbie O'Neill |
Lakeside by Julia Vaconsin free!
Published in Knotions, Winter 2008
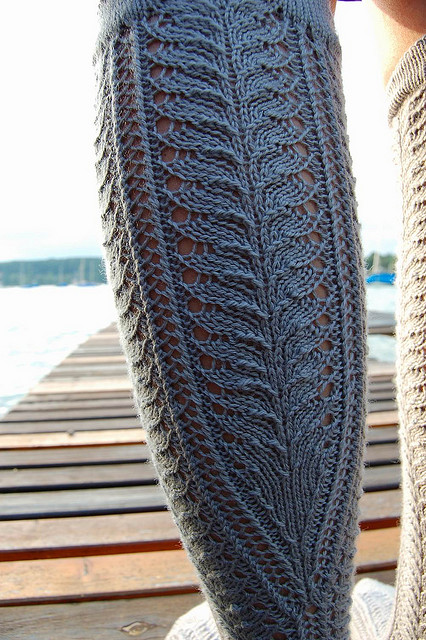 |
| © Julia Vaconsin |
No Slouch Socks by Elinor Brown free!
Published in Exercise Before Knitting
 |
| © Elinor Brown |
Rampant by Hunter Hammersen
Published in Violently Domestic
 |
| © Hunter Hammersen |
Woven Diamond Socks by Alexis Winslow free!
Published in knitdarling.com
 |
| © Alexis Winslow |
Rubus suberectus Socks by Hunter Hammersen
Published in The Knitter's Curiosity Cabinet
 |
| © Hunter Hammersen |
No comments:
Post a Comment